Up and Running with Virtual Environments, Part I
If you’ve ever tried to upgrade your Mac’s system installed Python, you know that it can be a pain, and it’s not at all recommended. Apple and other third-party installers rely on the installed version to operate correctly, so changing it can cause complications. There is a better way to safely install different versions of Python while maintaining the integrity of the system installed version; enter, virtual environments. Using virtual environments allows you to install multiple different versions while keeping a healthy separation between your system and your projects.
I use Homebrew as my package manager so pip and python commands have been symlinked to my brew library. Per their instructions simply paste
/usr/bin/ruby -e "$(curl -fsSL https://raw.githubusercontent.com/Homebrew/install/master/install)"
into your terminal and it will guide you through the rest.
Note: It’s been a little while, but you may need to install XCode command-line tools. If you need to do that you can
enter xcode-select --install and that should do the trick.
From there, the first thing I do is brew install python python3.
After that, getting started with virtualenv is pretty simple. I would also recommend adding virtualenvwrapper, which helps keep all of your environments in one place. Install them both with pip:
pip install virtualenv virtualenvwrapper
When you’re done there are a few exports that you’ll want to add to your .rc file. The first sets the location where you want to store your environment files. I have mine set up in a folder called Envs in my home directory. You can set your projects folder to wherever you’d like. I like to keep mine separate because your project files have nothing to do with your virtual env, a concept I’ll elaborate on in a minute. You can set the default binary by setting your VIRTUALENV_PYTHON variable to the path of your preferred version. In the example below, I’ve linked mine to the python3 version managed by brew. The final bit is for virtualenvwrapper. Set those, source your .rc file and you should be good to begin.
export WORKON_HOME=$HOME/Envs
export PROJECT_HOME=$HOME/Envs/Projects
export VIRTUALENV_PYTHON=/usr/local/bin/python3
source /usr/local/bin/virtualenvwrapper.sh
Once you’re set up, all you need to do is enter virtualenv and your environment name.
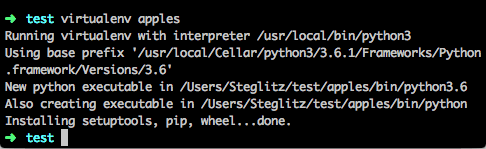
As you can see, it installs python 3.6.1 because I set my VIRTUALENV_PYTHON variable in my .rc file. It also installs the environment in the folder that I’m in. In this case, I created a folder called test in my home directory. So what if you want another version of Python? All you have to do is point virtualenv to a different binary like this:
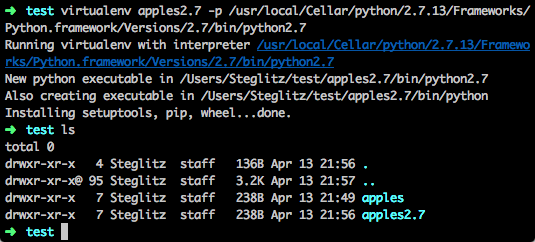
Now I have two virtual environments in one folder. If I want to use one, I activate it like so:

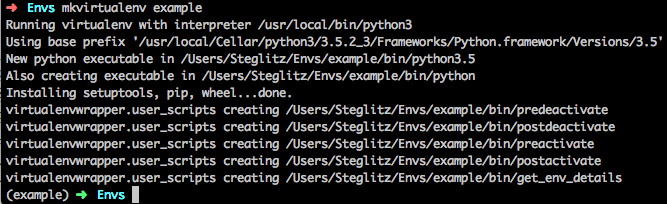
Now we come to why you installed virtualenvwrapper. Virtualenvwrapper installs and activates in one step. You need only
type mkvirtualenv and then add the name of your virtual env and virtualenvwrapper will do the rest. In the example
below, you can see that I created an env called ‘example’. You can tell that an env is active when you see its name in
brackets to the left of your prompt.
If you come back to your project later, simply type workon and add your env name from wherever you are and
it will start up your environment. When you’re done type deactivate and you’re done.
This brings me to the bit I mentioned earlier about environments and your code not necessarily having to do with each other. When your environment is active, pip only installs packages to that environment. Delete the folder where your environment lives and everything is gone and your system python remains unaffected. You could, however, set up a virtual env that runs a particular version that you like and then point your IDE or editor to that environment. You don’t actually need a separate environment for each project. It is handy, however, if you want to keep package separation between projects.
If you’re interested in more details about virtualenvwrapper, you can read about it in their docs. They have several usefull commands that make life easier. I hope this has been helpful. It’s been very usefull for me, and I hope you find it to be the same. Happy coding!